|
|
Post by blackdog on Sept 16, 2012 9:49:56 GMT
Hello All,
I thought this would be a good idea. As I m building my first bike I ll post pics and what I ve found out in this new thread. It ll all be simple basic stuff but if any new bods are thinking of having a go the can take a look and maybe get some ideas. Of course if some of you old hands want to chip in, comment on my progress, offer hints and links, that would be great and could form a usefull log of information for any newbies.
Will start posting pics shortly
Rick
|
|
|
|
Post by blackdog on Sept 16, 2012 12:25:52 GMT
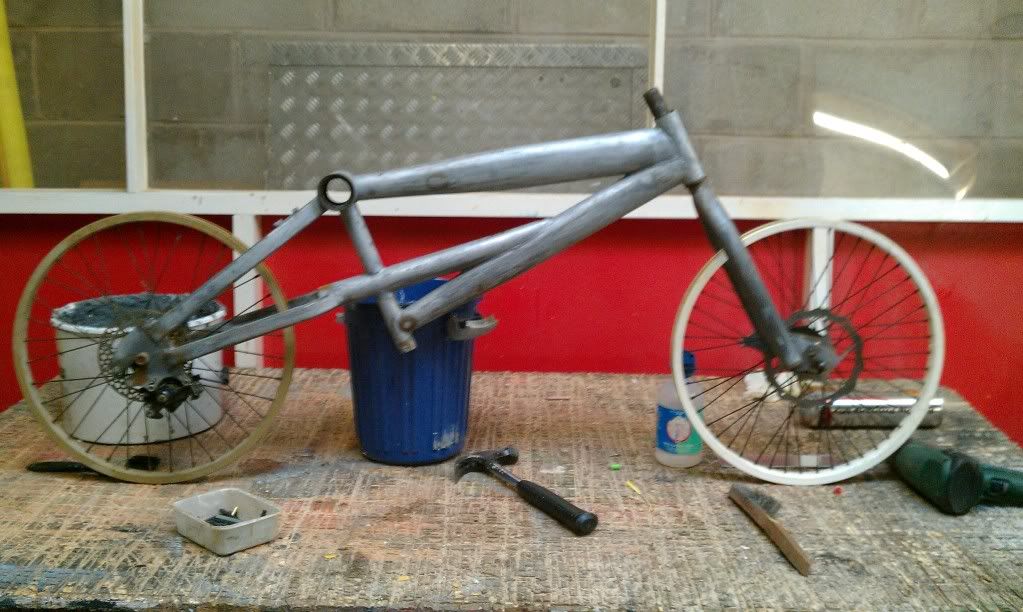
 Okay so this is where it started. I got the bike from a bloke that comes round collecting scrap metal off the estate. He wanted £40 and I couldnt be bothered to haggle ,so thats what is cost. Its a bit scabby but its got two disc brakes already fitted and I reckon theyll be pretty handy. Ten minutes later and its all stripped down and in bits, I ve saved all the bits in case I need them later. All the bearings tap out of the tubes that they seat in quite easily using a drift. All the bearing cleaned up with a mix of acetone and parafin (because its what I ve got). There was a slight twist in the rear forks where a car had run over it but a gentle application of the hammer soon fixed that. Next post will have next stage pic. |
|
|
|
Post by blackdog on Sept 16, 2012 12:43:19 GMT
 Ain that better. Half an hour withpaint stripper and a wire brush. Loosely re assembled. I ve flipped the frame as it seems to be what people do , it gets the bike lower to the ground. Its very easy to put the forks back in upside down, the bearing and housings seem to be the same top and bottom (at least they were on this bike) 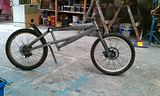 Forks and wheels back on to check discs run freely in the calipers, they dont, so further application of hammer needed, will strip down calipers later also wheel bearings. I ve welded on a side stand, that I ll remove late,r I just got sick of it falling over and not being able to stand back to get a good look at it. Also welded on a bit of 2 ins bar with supports to fasten the saddle to and to fix the rear fairing to. Note to self check regs before welding on far too long tail piece, it looked great but would have failed scrutineering. Next job will be to fit handle bars. I m toying with the idea of just inverting the existing ones so they hang down this has the advantage that they have a cross brace that would make a useable support for the front fairing. Will post pic if it works. |
|
markwoody
New Member
 Gravity just gets me down :)
Posts: 9
|
Post by markwoody on Sept 16, 2012 18:30:32 GMT
Looking good  , be sure to keep up regular updates , and lots of pics |
|
|
|
Post by blackdog on Sept 17, 2012 18:46:01 GMT
Another quiet day at work so plenty of progress on the bike. Have fitted temporary foot pegs to test position. 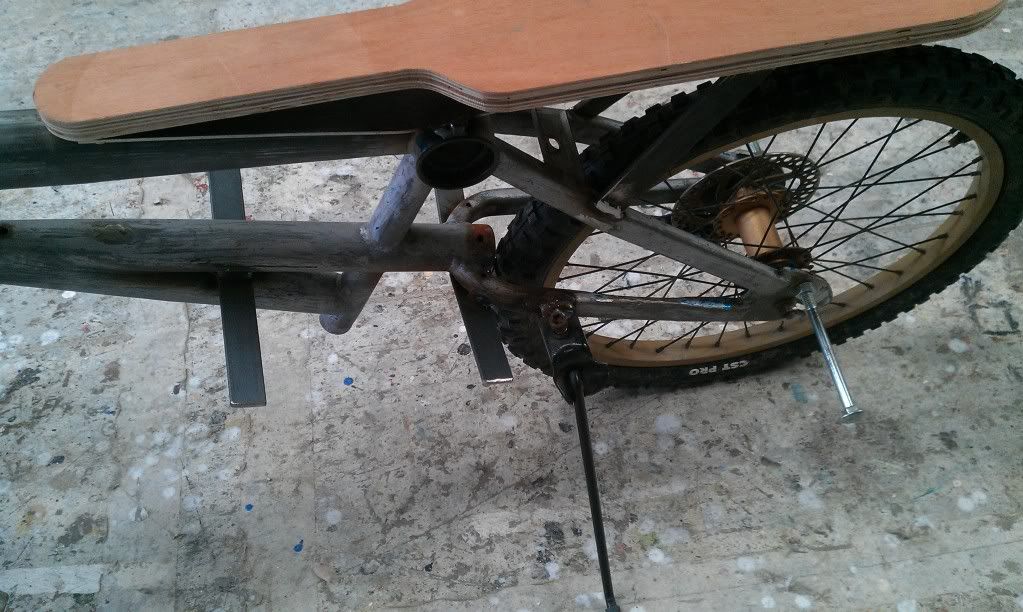 They are just 6 inch coach bolts and work just fine , although I had to cut one of the nuts in half as it rubbed on the bolts holding the disc on. Fitted temp seat and brackets to take knee supports. Seat is s uncomfortable but feels better when you get your knees up on the pegs, padding is going to help Fitted handle bars (upside down) and brake levers and connected front brake after servicing caliper. Lowered handlebar by removing surplus thread at the top of the head stock tube. May need to put a bit more of a bend in the bars and certainly need to shorten them 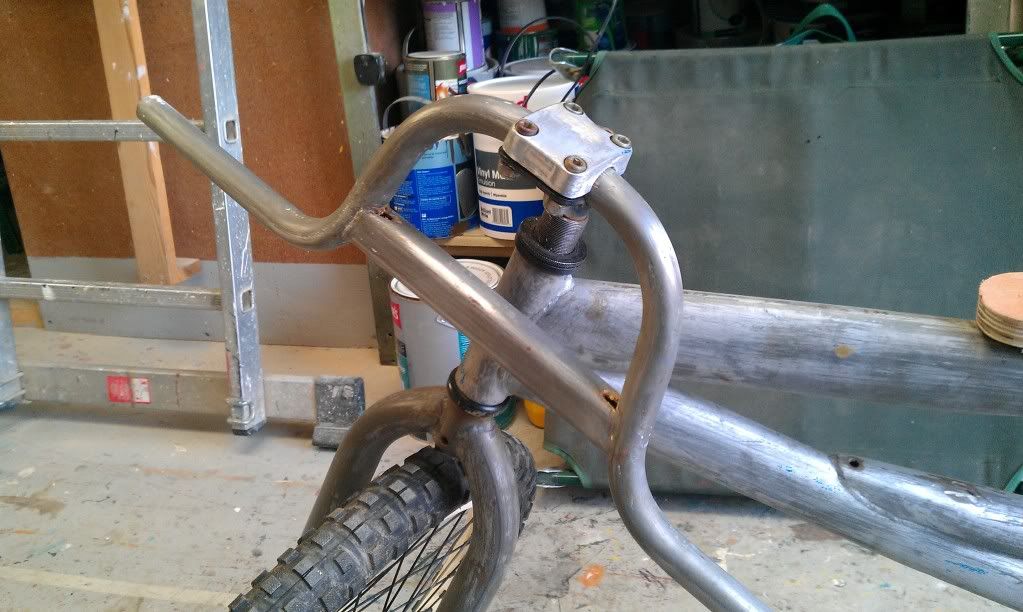 All works beautifully. Very easy to do. I ve used the welder for a few little jobs but you could just as easily drill and bolt if you have nt got access to one.  The bike is very nearly read to run. needs back brake, padding and upholstery a couple of small fairings and that should be it. Oh and weights. now then Lads whats the theory behind weighting the bike, obviously heavier is faster but where do I place the weights for balance and about how much ? Building the bike is turning out to be easier than I expected, it may not be a world beater but should provide plenty of cheap fun, and so far for only £40. Heres a picture of a silly old fool 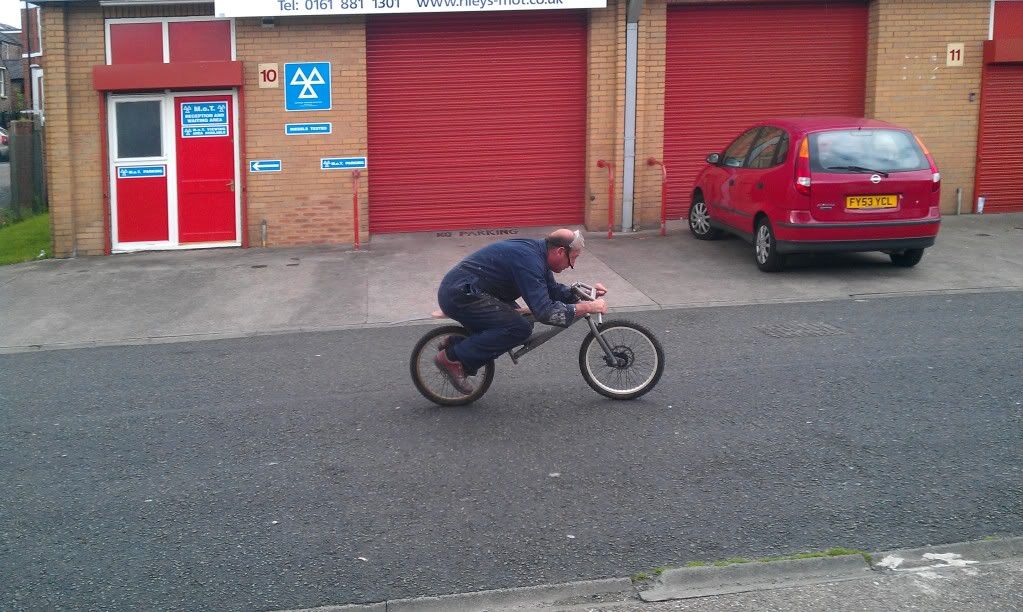 |
|
|
|
Post by peasnbarley on Sept 17, 2012 20:37:29 GMT
Hi Blackdog, Certainly beginning to look the part, the bike I mean. Lol
Sort of sad though because that's a cartie man lost and you were doing fine. The bike might only cost you £40.00 to build but I bet you start to lie like the rest of us when the wife asks how much the leathers, bike stand, paint, tyres etc,etc cost. Good luck with your new project.
|
|
brillo451
Junior Member
Go Fast or Crash
Posts: 59
|
Post by brillo451 on Sept 17, 2012 21:44:57 GMT
Hi Rick - That did not take you long, Looking at your last photo I think you may find a longer stem and positioning your feet further back will help your aero position and feel more comfortable this is the problem I had with our's when I first tested it. do you have any bike recyclers near you (perhaps attached to a collage ,they are a good source of stems and bits and bobs you cannot get any more from overpriced bike shops)
|
|
brillo451
Junior Member
Go Fast or Crash
Posts: 59
|
Post by brillo451 on Sept 17, 2012 21:52:33 GMT
The seat post is a good place to attach the weights to nice and low but too much may make the frame flex, but the design of your frame with the extra tube triangulating the seat tube it should be fine.
|
|
|
|
Post by blackdog on Sept 18, 2012 8:14:20 GMT
Dont worry Charlie cartie man not lost, just gathering breath before coming back stronger than ever. Planing next cart build. The latest incarnation of the Blackdog (Mustang) may have been a little faster than the original but I felt it had lost all its fun. It was very heavy to handle in the workshop and the drive just felt confined, I found I'd liked the open air rush and silence of the first body. So I m going to build a new cart , slightly higher off the ground to cope with multi surface.Its going to be dismantleable and lightweight, with provision for ballast and a removeable , lightweight body shell (ala Red Gazelle).
Back to bikes....Andy moving pegs is probably a good idea I ll give it a go ( I m not very bendy nowadays).Whats this stem that could be longer ? Tell me what it is and I ll give it a go.
I ve got all the extra parts from the off roader I built for Screwfix.There was a bicycle recyclers nearby, I donated a couple of bikes to them some years ago and they had hundreds of bikes in stock but when I went to try and buy bits they were useless and I gave up after about a year of trying to get in touch with them. Anyway after a while they lost their council funding and I think they closed down. Scrap metal collectors are a good place to get frames from , they are usually happy to sell them for a little over the scrap value.
|
|
brillo451
Junior Member
Go Fast or Crash
Posts: 59
|
Post by brillo451 on Sept 18, 2012 22:20:30 GMT
The stems length is the horizontal distance between tube that goes in to the forks and the mounting for the handle bars to go in to. This will stretch you out slightly more and will make the bike feel like you have more room. You could change the angle of the handle bars but this will raise you up at the front and cause drag. have a look at the post I put up yesterday and you will see what I mean, I got stems for ours from the bike recyclers for a couple of quid.
|
|
|
|
Post by muttsnuttsracing on Sept 21, 2012 8:40:46 GMT
Hi Rick,
Liking the build so far.... for what it's worth, here's my thoughts
* Get a longer stem, turn it upside down (so you get a negative angle) also moves you forward a bit.
* Foot pegs need to be 3cm diameter.
* Weight is good but.....to heavy and it takes a while to get going off the line (not good on short coures)
* Try to put the weight low and looking at your riding position put it below your chin (a vertical line down) if you use the seat post i think it'll be to far back (but what do i know)
* Cut the handlebars down at the cross member, so it resembles an upside down U - less frontal area and by having your hands vertical it brings your elbows in.
* and don't forget to leave space for plenty of stickers!!
Good luck and see you on a hill soon.
|
|
|
|
Post by blackdog on Sept 23, 2012 10:37:24 GMT
Thanks for those ideas Muttsnutts and Andy, in my wisdom I will use some of them and in my ignorance I ll not use some. Like the idea of cutting the handlebars right down but will try riding it holding on to the cut down bit first to see if I can steer. Weight forward was what I was thinking so thats a good suggestion. I will weld on some brackets for the weights I use in the cart. I am biding on a steering damper on ebay and starting to think about fairings etc. probably not going to use a longer stem but this may change later.
Will post pics of progress later....... and start thinking about colour schemes.
|
|
|
|
Post by blackdog on Sept 24, 2012 10:22:42 GMT
I ve won a steering damper on ebay..unfortunately it isnt adjustable. I ll try and make it work but it may be a bit too stiff , I ll know when it arrives. Do we steer much on these bikes or is most of it done by leaning?. Putting padding on kneeler boards and seat today and sorting bracketry for weights.
|
|
markwoody
New Member
Gravity just gets me down :)
Posts: 9
|
Post by markwoody on Dec 29, 2012 21:25:11 GMT
How's the build coming along ?
|
|
|
|
Post by blackdog on Mar 3, 2013 20:28:37 GMT
Finished
|
|


 , be sure to keep up regular updates , and lots of pics
